













September 16, 2026
Where Should You Install a Heat Pump Outdoor Unit? 7 Essential Site Checks
Share my #SolaXStory


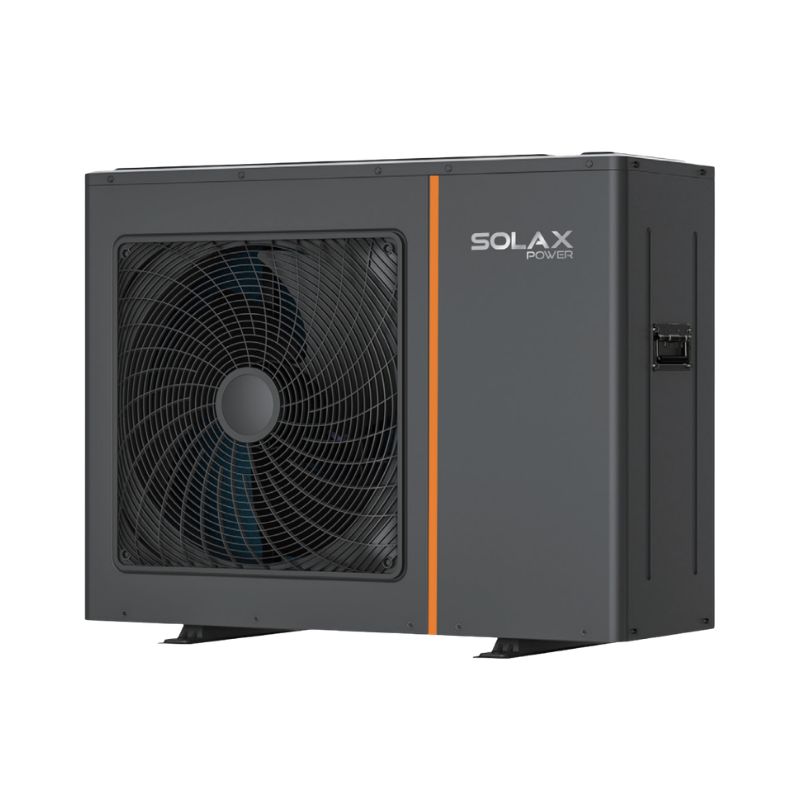
Choosing the right heat pump outdoor unit location is an important part of a safe and efficient air source heat pump installation.
The best place to install a heat pump outdoor unit is not simply the closest wall or the most hidden corner. The location must provide clear airflow, acceptable noise levels, safe defrost-water drainage, suitable service access and a practical route into the heating system.
A poorly positioned outdoor unit can increase noise, restrict heat pump performance, create ice around the unit or make future maintenance difficult.
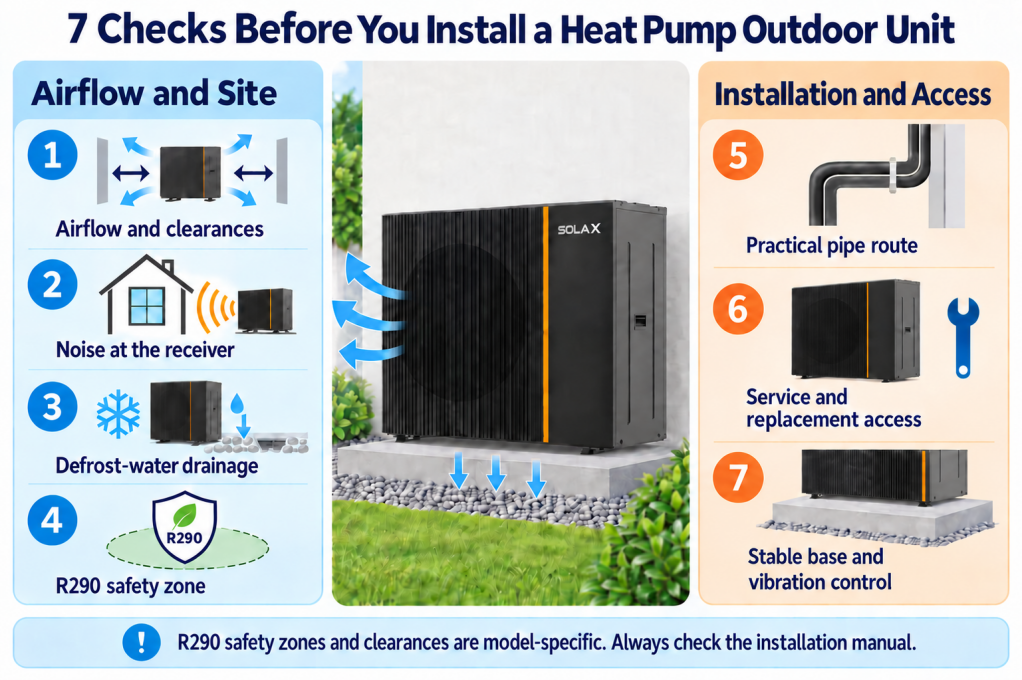
So, where should you install a heat pump outdoor unit? Use the following seven site checks to compare possible locations before installation.
Quick Heat Pump Outdoor Unit Location Check
A Good Candidate Location | A Location That Needs Reconsidering |
Open space in front of the air discharge | Narrow recess or enclosed corner |
Away from bedroom windows and seating areas | Directly beside a bedroom, patio or neighbour's window |
Planned route for defrost water | Above a path or where water can pool and freeze |
Stable, level and load-bearing support | Loose paving, soft ground or an unsuitable wall |
Short, accessible pipe route | Long, exposed or difficult-to-insulate pipework |
Clear access to panels and components | Boxed in by fencing, storage or vegetation |
Product-specific safety zone remains clear | Safety area overlaps restricted openings, drains or ignition sources |
This table provides an initial heat pump installation location check. It does not replace the product installation manual, a professional site survey or applicable local regulations.
Allow Enough Space Around the Heat Pump for Airflow
Correct airflow is one of the most important factors when deciding where to install an air source heat pump.
An air source heat pump draws in large volumes of outdoor air and discharges colder air after extracting heat from it. Both the air inlet and outlet must remain unobstructed.
Avoid installing the outdoor unit in a:
Narrow passage
Deep recess
Enclosed corner
Poorly ventilated structure
In these locations, discharged cold air may return to the air inlet. This recirculation—sometimes called an air short circuit or thermal short circuit—can reduce the available heat and make the heat pump work harder.
Fences, planting and acoustic screens may be possible, but they must maintain the heat pump clearance requirements and airflow distances specified in the selected product's installation manual.
A decorative heat pump cover designed without proper airflow calculations can create more problems than it solves.
Always check the manufacturer's minimum clearances before confirming the final outdoor heat pump location.
Assess Heat Pump Noise at the Receiver
Heat pump noise should be assessed where people will actually hear it, not only directly beside the outdoor unit.
Product specifications may state a sound power level or sound pressure level under defined test conditions. However, neither figure alone tells a homeowner how much noise will be heard inside a bedroom, on a patio or at a neighbouring window.
A heat pump noise assessment should consider:
Distance to bedrooms
Distance to neighbouring habitable rooms
Nearby windows and doors
Reflective walls
Corners and narrow passages
Outdoor unit orientation
Barriers between the heat pump and the receiver
Vibration transmitted through the base or building structure
Heat pump operation during cold weather
Defrost-cycle operation
Where required, the installer should complete the applicable heat pump noise assessment before confirming the installation position.
Moving the unit behind a suitable corner or barrier may sometimes reduce the sound reaching a receiver. However, enclosing the heat pump without proper design can restrict airflow and reduce performance.
The best air source heat pump location therefore needs to balance both airflow and acoustic performance.
Plan Heat Pump Defrost Water Drainage
A heat pump outdoor unit also needs a suitable route for defrost water drainage.
During cold and humid weather, frost can form on the outdoor heat exchanger. The heat pump periodically enters a defrost cycle to remove this frost, producing water beneath or around the outdoor unit.
This water must drain safely without:
Flowing across a path, entrance or driveway
Pooling against the building
Freezing underneath the heat pump
Damaging paving or landscaping
Blocking the drainage route during winter
The outdoor unit base height, drainage design and local ground conditions should be considered together.
A heat pump location that appears suitable during summer may become unsafe in winter if heat pump defrost water freezes around the unit or across a pedestrian area.
Proper drainage should therefore be considered before the outdoor unit is installed, rather than added as an afterthought.
Check Refrigerant Safety Requirements
Refrigerant type can affect heat pump installation requirements, particularly when selecting the outdoor unit location.
For an R290 heat pump, the manufacturer's installation instructions may specify a refrigerant safety area around parts of the outdoor unit.
Depending on the heat pump model and site conditions, the required safety area can affect proximity to:
Basement windows
Doors and other building openings
Ventilation inlets
Drains
Below-ground spaces
Electrical equipment
Potential ignition sources
Areas where leaked refrigerant could collect
There is no single generic R290 heat pump safety distance that should be applied to every product.
The applicable safety zone must be taken from the selected model's installation instructions and checked against relevant local requirements.
For this reason, always confirm the product-specific refrigerant requirements before finalising an R290 heat pump installation location.
Keep the Heat Pump Pipe Route Practical
The heat pump outdoor unit does not necessarily need to be installed directly against the house, but the pipe route between the outdoor unit and indoor heating system should remain practical.
Long or exposed pipe runs can:
Increase installation cost
Increase heat loss
Increase hydraulic resistance
Make insulation and weather protection more difficult
Create additional installation complexity
For a monobloc heat pump installation, external water pipes also require suitable insulation, weather protection and a project-specific freeze-protection strategy.
The shortest possible pipe route is therefore not automatically the best location.
A better principle is:
Choose the shortest suitable pipe route after airflow, noise, drainage and refrigerant safety requirements have been checked.
This provides a better balance between installation efficiency and long-term system performance.
Leave Enough Space for Heat Pump Maintenance and Replacement
Good heat pump outdoor unit placement must also provide enough space for future maintenance.
The outdoor unit should remain accessible after fences, plants, bins, garden furniture and storage have been added around the property.
Installers and service technicians need adequate space to:
Remove service panels
Inspect internal components
Clean the outdoor heat exchanger
Check electrical and hydraulic connections
Safely use maintenance tools
The complete equipment life cycle should also be considered.
Ask:
Can the heat pump be delivered safely to the location?
Can heavy components be accessed and serviced?
Can the complete outdoor unit eventually be removed?
Would part of the building need to be dismantled for replacement?
Could vegetation grow into the airflow or service area?
A concealed heat pump location that cannot be serviced properly is not a suitable location.
Allowing sufficient heat pump service clearance during installation can make future inspection, maintenance and replacement significantly easier.
Install the Heat Pump on a Stable Base and Control Vibration
The heat pump outdoor unit should be installed level on a durable, stable and load-bearing support that is suitable for both the product and the site.
Depending on the installation, this may include:
Ground frame
Plinth
Concrete base
Suitable wall-mounting system
The installer should consider:
Heat pump weight
Ground conditions
Wind exposure
Snow
Flooding risk
Ground movement
Vibration transmission
The type of mounting can also affect heat pump noise and vibration.
For example, mounting a heat pump on an external wall close to a bedroom can create a different vibration risk from installing the same unit on an independent ground base.
Roof, garage and other elevated heat pump installations may also be possible, but they require additional checks for structural capacity, safe service access, drainage, wind loading, planning requirements and future equipment replacement.
Choose the Right Heat Pump Location Before Installation
Finding the best location for an air source heat pump outdoor unit requires more than choosing the most convenient or visually discreet position.
Before installation, compare potential locations based on airflow, noise, defrost drainage, refrigerant safety, pipe routing, maintenance access and structural support.
Finding the best location for an air source heat pump outdoor unit requires more than choosing the most convenient or visually discreet position.
Before installation, compare potential locations based on airflow, noise, defrost drainage, refrigerant safety, pipe routing, maintenance access and structural support.
FAQ
Table of Contents
Latest News
Explore expert insights, practical guides, and the latest news on SolaX Power.




To the Latest Newsletter
Stay Ahead with the Latest SolaX Updates!
Subscribe
I have read and agree to Privacy Policy and User Terms