


June 18, 2026
Is Your Solar Inverter Warranty Still Valid? Period & Extension Guide
Share my #SolaXStory


Your solar panels may last 25 years—but your inverter probably won't.
That's why understanding your solar inverter warranty is critical before something goes wrong.
From the standard inverter warranty period to brand-specific rules like the SolaX inverter warranty upgrade, this guide explains:
What your inverter guarantee actually covers
When your warranty officially starts
What voids your protection
How to check your warranty status
Whether you should buy an extended warranty
If you own a string, hybrid, or microinverter system, this article will help you avoid costly mistakes and protect the "heart" of your solar setup.

What is a Solar Inverter Warranty?
A solar inverter warranty is a guarantee to repair or replace your device if it fails due to internal factory defects. This protection is divided into two distinct types:
Product Warranty (Manufacturer): Covers internal hardware, circuit boards, and software. It applies if the unit fails under normal operating conditions.
Workmanship Warranty (Installer): Covers the installation quality, including issues like loose wiring, improper mounting, or roof leaks caused during setup.
Important Note: Most manufacturers, including SolaX, strictly stipulate that the warranty is only valid if the product is purchased from an authorized distributor and installed by a certified professional. Using uncertified installers or buying through unofficial channels can void your protection immediately.
What Most Warranties Won't Cover?
While a solar inverter warranty is a vital safety net, it isn't an "all-risk" policy. Based on standard industry terms and SolaX warranty guidelines, your claim may be rejected in the following cases:
Late Reporting: Failures must be reported within a specific window (e.g., SolaX requires reporting within 4 weeks of the issue appearing).
Improper Installation or Relocation: If the inverter is moved after its initial installation, or if the setup doesn't follow the official manual to the letter, the warranty is typically voided.
Acts of Nature & Force Majeure: Damage from lightning, floods, fire, corrosion, or pest damage (like rodents) is not covered. These should be included in your home insurance.
Unauthorized Modifications: Using third-party hardware or software to control the inverter without written consent, or altering the product's serial number.
Cosmetic Flaws: Minor scratches or stains that don't affect the inverter's actual performance are excluded.
For a full list of detailed legal terms and conditions, you can view the complete SolaX Warranty Policy here.
Pro Tip: Always inspect your package upon delivery. If there is transportation damage, you must document it with photos before signing the receipt, or the manufacturer may deny the claim.
When Does a Solar Inverter Warranty Start?
The start date of a solar inverter warranty depends on the manufacturer's policy. In most cases, the warranty begins on one of the following dates:
The installation or commissioning date
The purchase invoice date
The shipment date from the factory (if no registration is completed)
Because policies vary, it's important to confirm the exact trigger date in your manufacturer's warranty terms.
The SolaX Warranty Rule: Don't Miss the 90-Day Window
Using SolaX as a prime example, the brand offers a clear but time-sensitive path for its customers.
Registration is Key: To get the full benefit of your warranty, you (or your installer) must register the product online within 90 days of the commissioning date. You can do this at the SolaX Cloud User Center.
What if you forget to register? If the product isn't registered within that 90-day window, SolaX defaults the start date. In this case, the inverter warranty period is calculated as the production date plus 6 months.
Solar Inverter Warranty Period by Inverter Type
The inverter warranty period varies significantly depending on the technology used. This difference usually comes down to how much "stress" the device handles and where it is located.
While specific brands have their own rules, here is the general industry standard for the three main types of inverters:
String Inverters: The Central Workhorse
Typical Warranty: 5 – 12 Years
String inverters are the most common choice for residential solar. They handle the high-voltage DC electricity from your entire array of panels. Because they do all the heavy lifting in one central unit, they generate significant heat and face high electrical stress.
Microinverters: Built for the Long Haul
Typical Warranty: 20 – 25 Years
Microinverters are installed on the back of each individual solar panel. While they are exposed to roof-top heat, they only deal with low-voltage power from a single panel. This decentralized setup reduces the "load" on each unit.
Hybrid Inverters: The Smart (But Complex) Brain
Typical Warranty: 5 – 10 Years
Hybrid inverters are the most advanced units on the market. They manage power from your panels, the grid, and your battery storage all at once. This "triple-duty" role requires more complex internal circuitry and a dedicated battery interface.
Why the shorter period? More internal components mean more points of potential failure over time. Therefore, the hybrid inverter warranty length usually hovers around the 10-year mark.
How to Check Your Inverter Warranty Status?
If you're unsure whether your system is still covered, checking your inverter warranty status is straightforward. Most manufacturers provide online tools or customer support channels to verify coverage using your serial number.
Follow these steps:
Step 1: Locate Your Serial Number (S/N)
The first thing you need is your inverter's serial number.
You can usually find it:
On a label on the side or bottom of the inverter
Inside your commissioning report
On your purchase invoice
Inside your monitoring app (for some brands)
Tip: Take a clear photo of the nameplate in case support asks for verification.
Step 2: Log into the Manufacturer Portal
Many brands offer an online manufacturer portal where you can check warranty details.
For example, SolaX users can:
Visit SolaX Cloud
Log into the user center
Select your registered device
View product details and registration date
If your inverter was properly registered within the required timeframe, your warranty start date and upgraded coverage (if applicable) should be visible in your account.
Step 3: Contact Customer Support (If Needed)
If you cannot find the information online, contact the manufacturer or your local distributor directly.
Be prepared to provide:
Serial number (S/N)
Installation date
Proof of purchase (invoice or receipt)
Your contact information
Commissioning report (if available)
For SolaX:
Email: info@solaxpower.com
Official contact page: https://www.solaxpower.com/contact-us.html
Should You Buy an Extended Inverter Warranty?
Before spending money on an extension, you should check if your inverter is eligible for a free 10-year upgrade. Many SolaX users can double their warranty simply by connecting their system to the internet.
SolaX Warranty: How to Get 10 Years for Free
Product Series | Standard Warranty | How to Upgrade to 10 Years (FREE) |
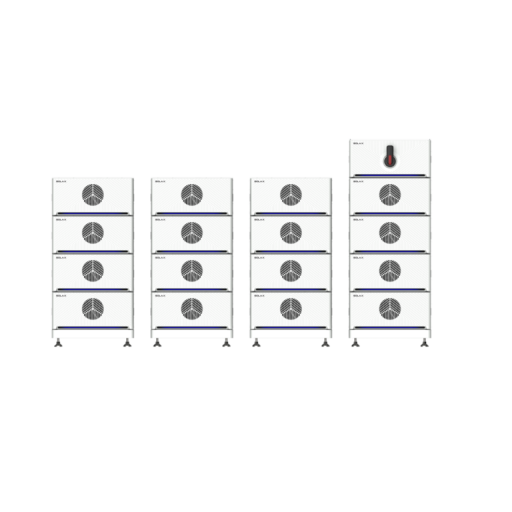
X1/X3-Hybrid-G4; X1/X3-Fit-G4; X1/X3-IES; X3-ultra; X3-HYB-G4 PRO; X1-VAST; | 5 Years | Stay Connected: Connect to SolaX Cloud and ensure data is successfully uploaded to the server. |
X1-Hybrid-LV; X1-LITE-LV; X3-NEO-LV; | 5 Years | Pair & Connect: Use a SolaX Battery AND connect to SolaX Cloud with successful data uploads. |
The Paid Option: If You Prefer to Stay Offline
If you choose not to use SolaX's cloud monitoring or don't meet the requirements above, you can still purchase an extension. However, there are strict deadlines to keep in mind:
When to Buy: You must purchase the extended warranty within 6 months of the installation date or within 12 months of the production date.
Where to Buy: You can buy directly from your authorized SolaX distributor or purchase it yourself through the SolaX Cloud platform after your system is registered.
The Result: Your total coverage will be the remaining original warranty plus the new extension period, all tracked automatically in the SolaX system.
How to File a Solar Inverter Warranty Claim?
While every manufacturer has its own specific fine print, the claim process is generally consistent across the industry. To give you a clear picture, let's look at the SolaX warranty claim process as a standard example of what you'll need to do.
Step 1: Start with Your Installer
In the solar world, your installer is your first line of defense. Most brands, including SolaX, require you to contact the local distributor or the company that installed your system first. They are trained to perform initial diagnostics and will contact the manufacturer on your behalf.
Step 2: Escalate if Necessary
If your installer is no longer in business or their service is unsatisfactory, you can go directly to the source. For a SolaX claim, you can reach their global service team at service.global@solaxpower.com or via their official website.
Step 3: Provide the "Proof Package"
To avoid having your claim rejected, you must provide specific data. Using SolaX's requirements as a checklist, make sure you have:
Product Details: Model number and Serial Number (S/N).
Proof of Purchase: A copy of your original invoice, receipt, or commissioning report.
System Info: The brand and number of PV panels used (and battery info if it's a hybrid system).
The Error: A photo of the error message on the LCD screen and a description of what happened.
Step 4: Watch the Clock
One of the most common reasons claims are denied is late reporting. For example, SolaX requires all claims to be filed within 4 weeks of the failure date. If you wait too long, you may lose your eligibility for a free replacement.
A Final Warning: The "No Fault" Charge
Be 100% sure the unit is actually defective before requesting an on-site inspection. Under SolaX's terms—which are common among Tier 1 brands—if a technician is sent out and finds the inverter is working fine (or the fault was caused by your installation/environment), you will be billed for all labor, travel, and delivery costs.
Pro Tip: Never attempt to repair the unit or replace parts yourself before getting written consent from the manufacturer. Unauthorized DIY fixes are the fastest way to void your entire warranty.
FAQ
Table of Contents
Latest News
Explore expert insights, practical guides, and the latest news on SolaX Power.


To the Latest Newsletter
Stay Ahead with the Latest SolaX Updates!
Subscribe
I have read and agree to Privacy Policy and User Terms